INTRO:
Dive into the transformative world of DIY with Velda's journey, as she and her husband take on the elegant yet simple task of kitchen bench panelling using the new Portaline Lining Boards. A testament to style meeting functionality, this guide is your gateway to effortlessly enhancing your home's aesthetic and value. Let Velda's firsthand experience inspire your next home project - from selecting the Portaline profile to the final touch of paint. Interested in simple DIY transformations that make a big impact? Let's get started.
Panelling Made Easy with New Portaline Lining Boards by Velda Taylor-Chan
DIY Kitchen Bench:
Whether you like it or love it, wall panelling is one interior trend that’s here to stay! Not only do they add texture, depth, interest and aesthetic appeal to your walls, they also have added benefits like wall protection and added insulation, they’ll hide defects in your walls, and may even increase your property value too. And if you’ve always wanted to try your hand at panelling but been too scared to, Porta have now introduced their new Portaline lining boards, which provide an affordable, practical, simple and effortless solution for even novice DIYers. These new lining boards were created to be lightweight and easy to handle, without compromising on quality. In short, Portaline makes it simple for DIYers to transform any space and achieve professional-looking results!
Join us on our journey to see how easy it was to elevate our kitchen space with the new Portaline Dune Lining Boards!
Before:

I’ll be the first to admit that there really wasn’t much wrong with our kitchen under-bench before the panelling. It had a classic glossy white finish. However, after his initial scepticism and much convincing, my husband would be the first to admit how much better it now looks with the panelling!
So let’s get started below with the tools and materials we used.
Tools and Materials Used (All Available from Bunnings):
- Portaline Dune Profile Lining Boards
- Ryobi 18V ONE+ 184mm Mitre Saw
- Ryobi 18V ONE+ Caulking Gun
- Selleys Liquid Nails
- Paint – British Paints 4L Gloss Water Based PRO Enamel Paint in Love Note (suitable for both bathrooms and kitchens)
- Paint Brushes
- Sander / sandpaper – to finetune the fit of the panels where there are slight discrepancies
- Optional: Philips Hue LED Light Strips
Step 1: Measure and Cut Panels
The Portaline Lining Boards come in 9.15cm (width, 8.4cm cover) x 2.7metre (length), so first of all, we measured the height under the kitchen bench to determine the lengths (2.7m) that we needed to cut.
Important Note: To calculate how many pieces are required for your area size, you need to calculate using the cover of the Portaline lining board and not the width. Portaline Dune Cover is 8.4cm.

When measuring, you will need to consider where you are going to install the linings in relation to the skirting. One of the benefits of the Portaline range is that at only 12mm thick and being so light weight, we found that it would sit quite comfortably on top of our skirting board without sticking out or looking out of place. So being the novice DIYers looking for the simplest solution, we decided to install our linings above the skirting line and measured accordingly.
There were slight variations in height (1-2mm) across the bench, especially from one end to the other, but we cut all panels to the longer standard length and then sanded down the ends to fit where necessary.
Once we had measured the height needed for each lining board, we measured the length of the area to be covered and calculated the number of panels we needed to cut. See the example below of our calculations.
Example of our calculations:
Our kitchen bench is L-shaped:
- The long side is 295cm wide x 83.5cm height
- The short side is 102cm wide by 83.5cm height.
Portaline Dune Profile Lining Board per piece:
- 270cm Length
- 8.4cm Cover
Pieces required:
- (Required Area Width / Cover of Lining Board) / (Length of Lining Board / Required Area Height)
- [(295 + 102cm) / 8.4cm] / (270cm / 83.5cm)
- (397cm / 8.4cm) / (270cm / 83.5cm)
- 48 / 3 pieces *Note in a 270cm length board, you can divide into 3x pieces of 83.5cm height
- 16 + 5% Wastage **Note: Always add 5% Wastage as recommended by Porta
- Total Required: 17 Pieces

We used a Mitre Saw to cut the panels. In order to achieve straight, consistent and quick cuts every time, we affixed the mitre saw to the table, and screwed down a stopper at one end so that for every cut, we simply needed to hold the lining board flush against the stopper and cut down.
Step 2: Paint Lining Boards
The hardest part of painting the lining boards was choosing a paint and colour. Although the paint we used was determined in the end by the colour we chose, it wasn’t the easiest decision! When choosing the colour, we considered whether we wanted to create a “feature” wall or go a crisp white and if white, what shade of white. Ultimately, we decided to keep things simple and opted to match our existing cabinetry as best we could. We grabbed a number of white paint cards from Bunnings and used sticky tape to tape them all up against our cabinet, looking at them under different lighting scenarios to find the best match. We then selected an Enamel Paint for the job – so it would be appropriate and harder wearing for the kitchen.


Porta recommends that you apply one coat of paint to the lining boards prior to installation, then paint a second coat if required once installed. Because we were using the lining under our kitchen bench, where we sit and eat most of our meals and where the kids tend to swing and kick their legs most, we applied 2-3 coats of paint to better protect the lining boards. As we chose the paint and colour to match our existing cabinetry, the extra coat of paint also helped achieve a deeper glossier finish to match our gloss cupboards on the other side.
Step 3: Clean your Wall
While the paint was drying, we cleaned the under-bench area as thoroughly as possible to maximise the effectiveness of the adhesive we would be using. I used a cleaning spray and cloth to do this, but I believe Methylated Spirits or Isopropyl Alcohol would be ideal as they evaporate and the surface to dry faster.
Step 4: Apply Lining Boards using Adhesive
Once all our lining boards were cut and painted and the under-bench wall surface was cleaned, we got onto the fun and super satisfying part of putting it all together!
As our bench is L-shaped with a corner, we started at the corner and worked our way out from there.

The first step of application was to align the two corner panels at a 90-degree angle. However, in addition to ensuring the external corner join was smooth, we also used a spirit level to ensure that each panel was also placed perfectly straight. Using the spirit level to check each of the next 2-3 panels from there, we were able to quickly glue and apply the rest of the panels.

Porta recommends the use of a general construction adhesive for fixing the boards. We used Selleys Liquid Nails and applied it to each panel using the Ryobi 18V ONE+ Caulking Gun. Porta also recommends using Brad nails through the tongue of each board to secure them while the glue is drying. However, we found that the panels held up securely with the use of the Liquid Nails alone. We checked to ensure that each panel was placed as “flush as possible” when installing each one against the previous one. We also used the spirit level every few panels to ensure they remained vertically straight. And we made sure during the drying time that the panels did not slide down since we opted not to nail them!
Applying the lining boards was fairly straight forward overall. However, as we have a power point under our bench, fitting the linings around this was a little trickier. We didn’t have the experience or know-how to make a perfect 90-degree cut, so we cut out a series of rectangular pieces to fit around the power point, much like a jigsaw puzzle.
Step 5: Apply Finishing Coat of Paint
The final step in installing the Portaline Lining Boards was to apply a finishing coat of paint.
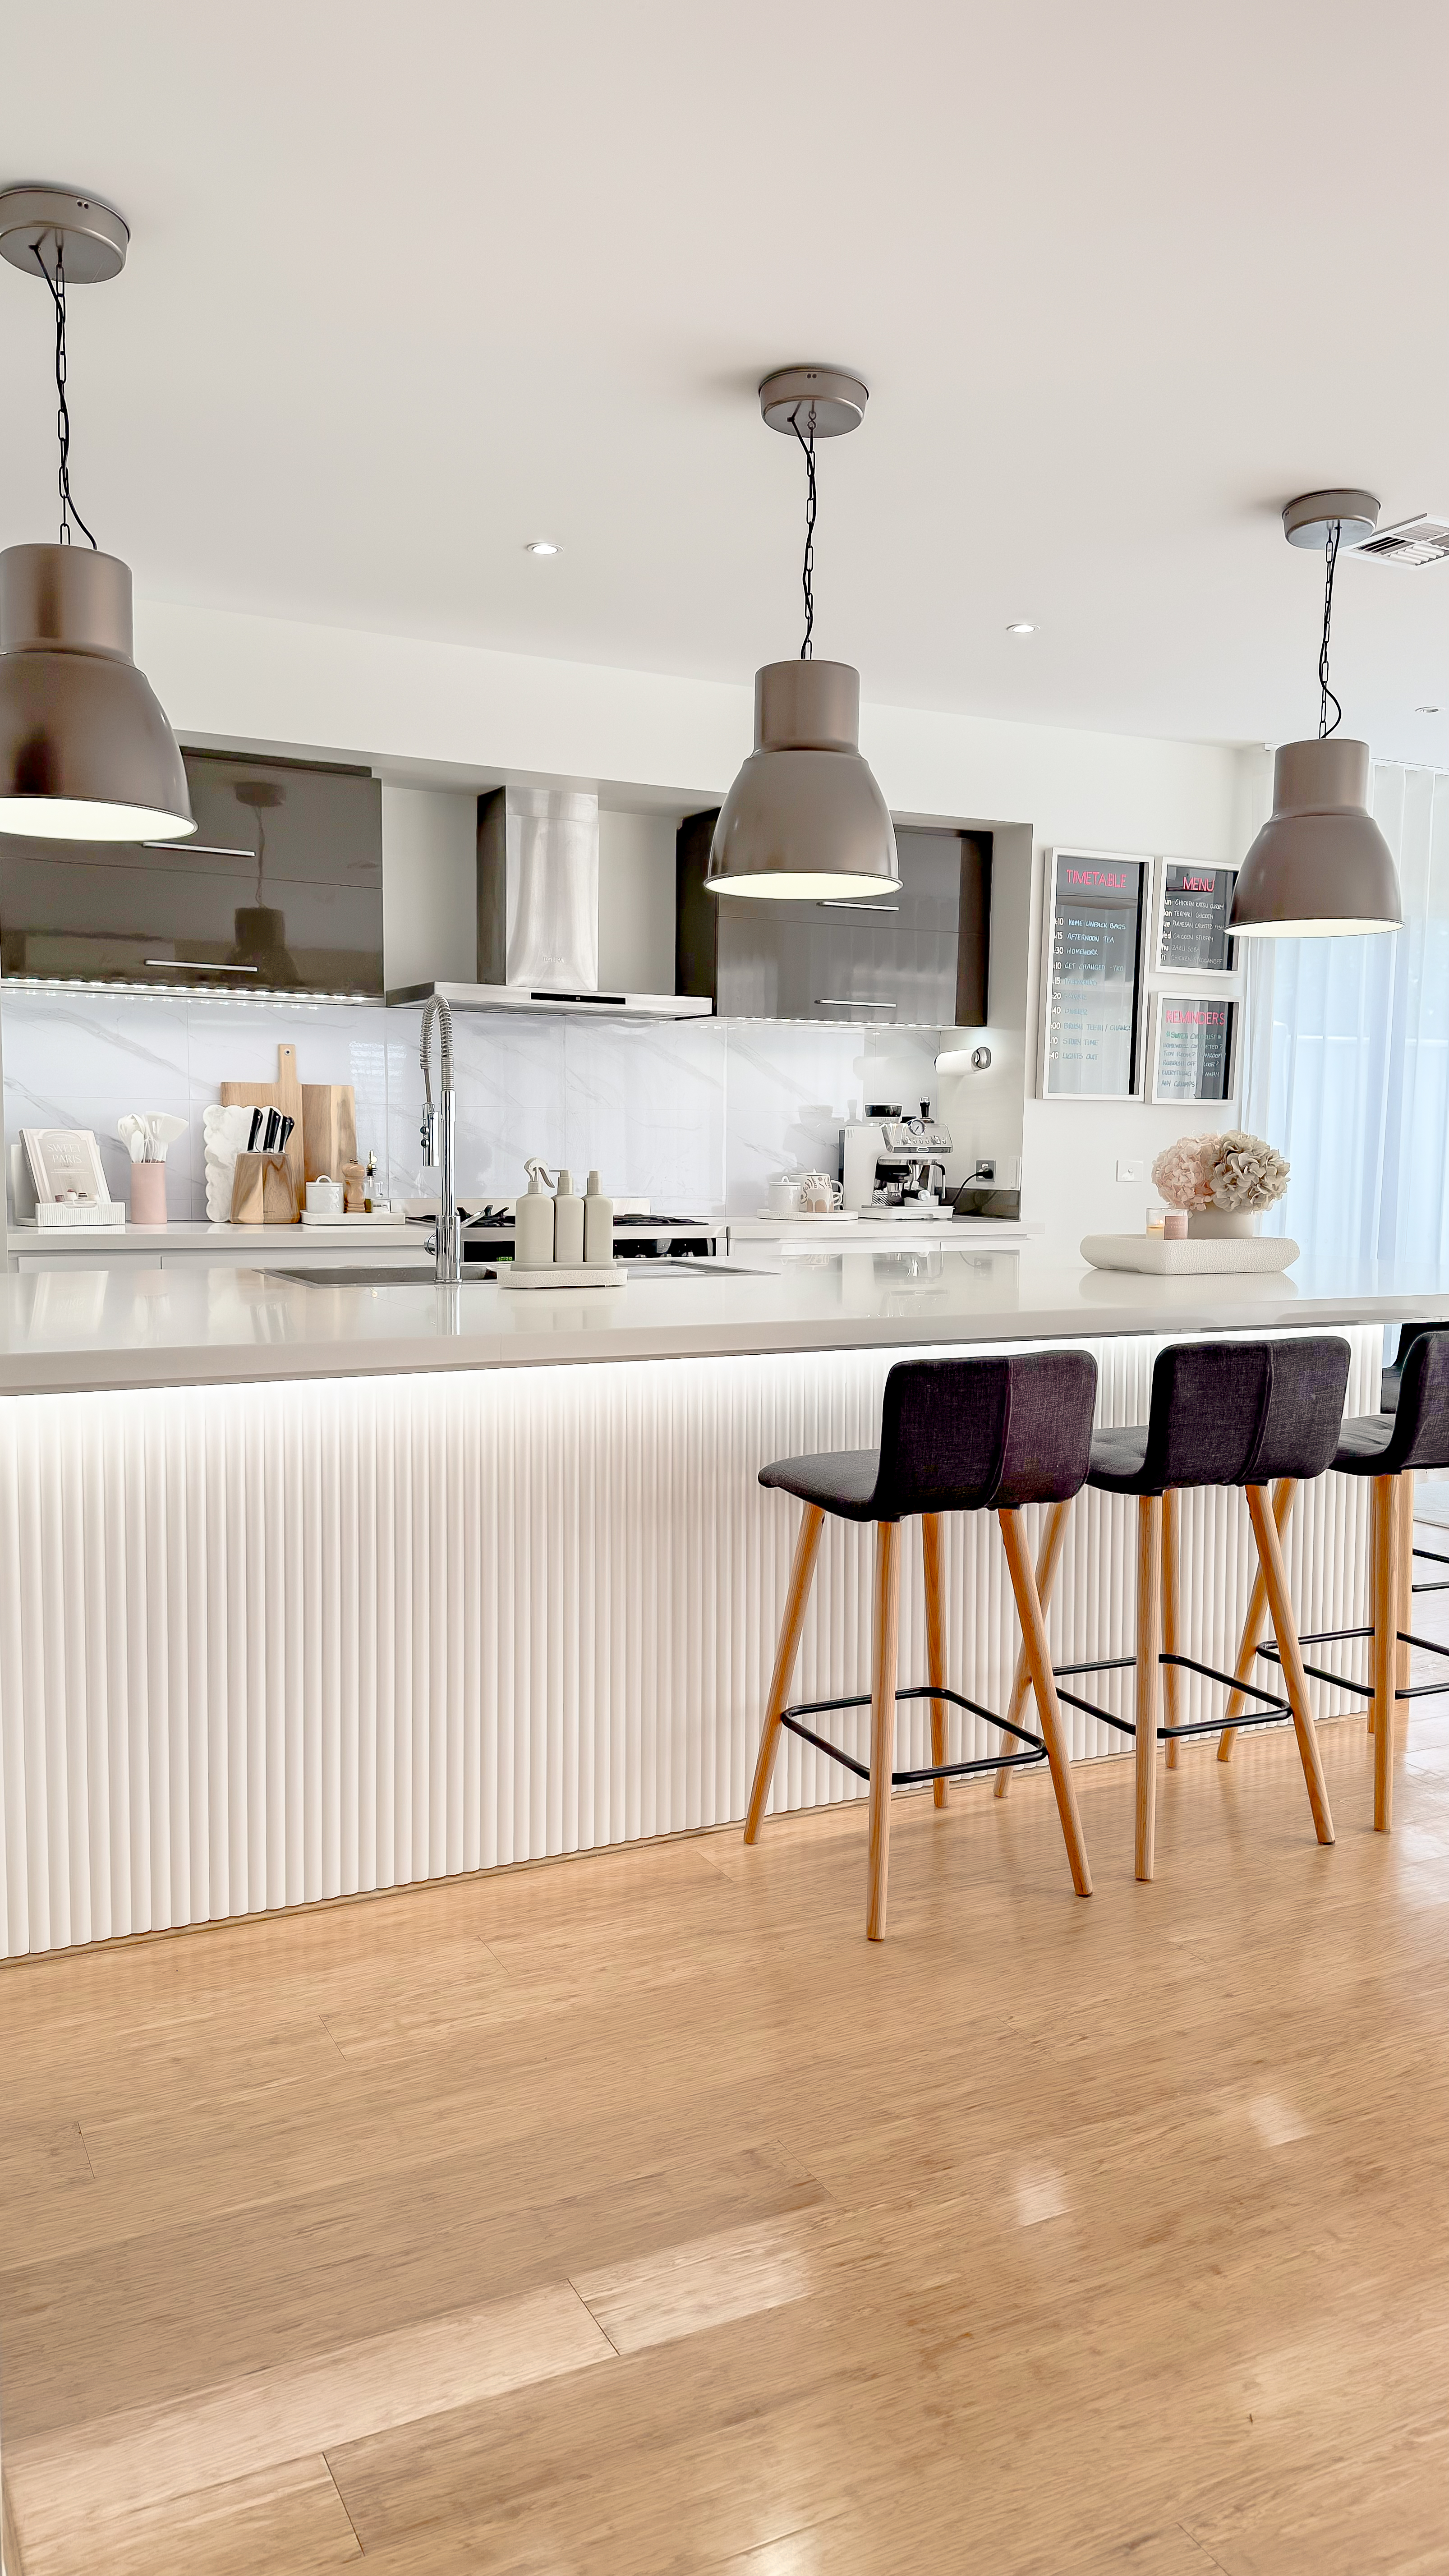
Step 6: Lighting
To further enhance and complement our new Portaline Linings, we installed some Philips Hue Light Strips under the bench. These strips come with an adhesive backing so were super easy to apply along the underside of the bench and simply plugged in.
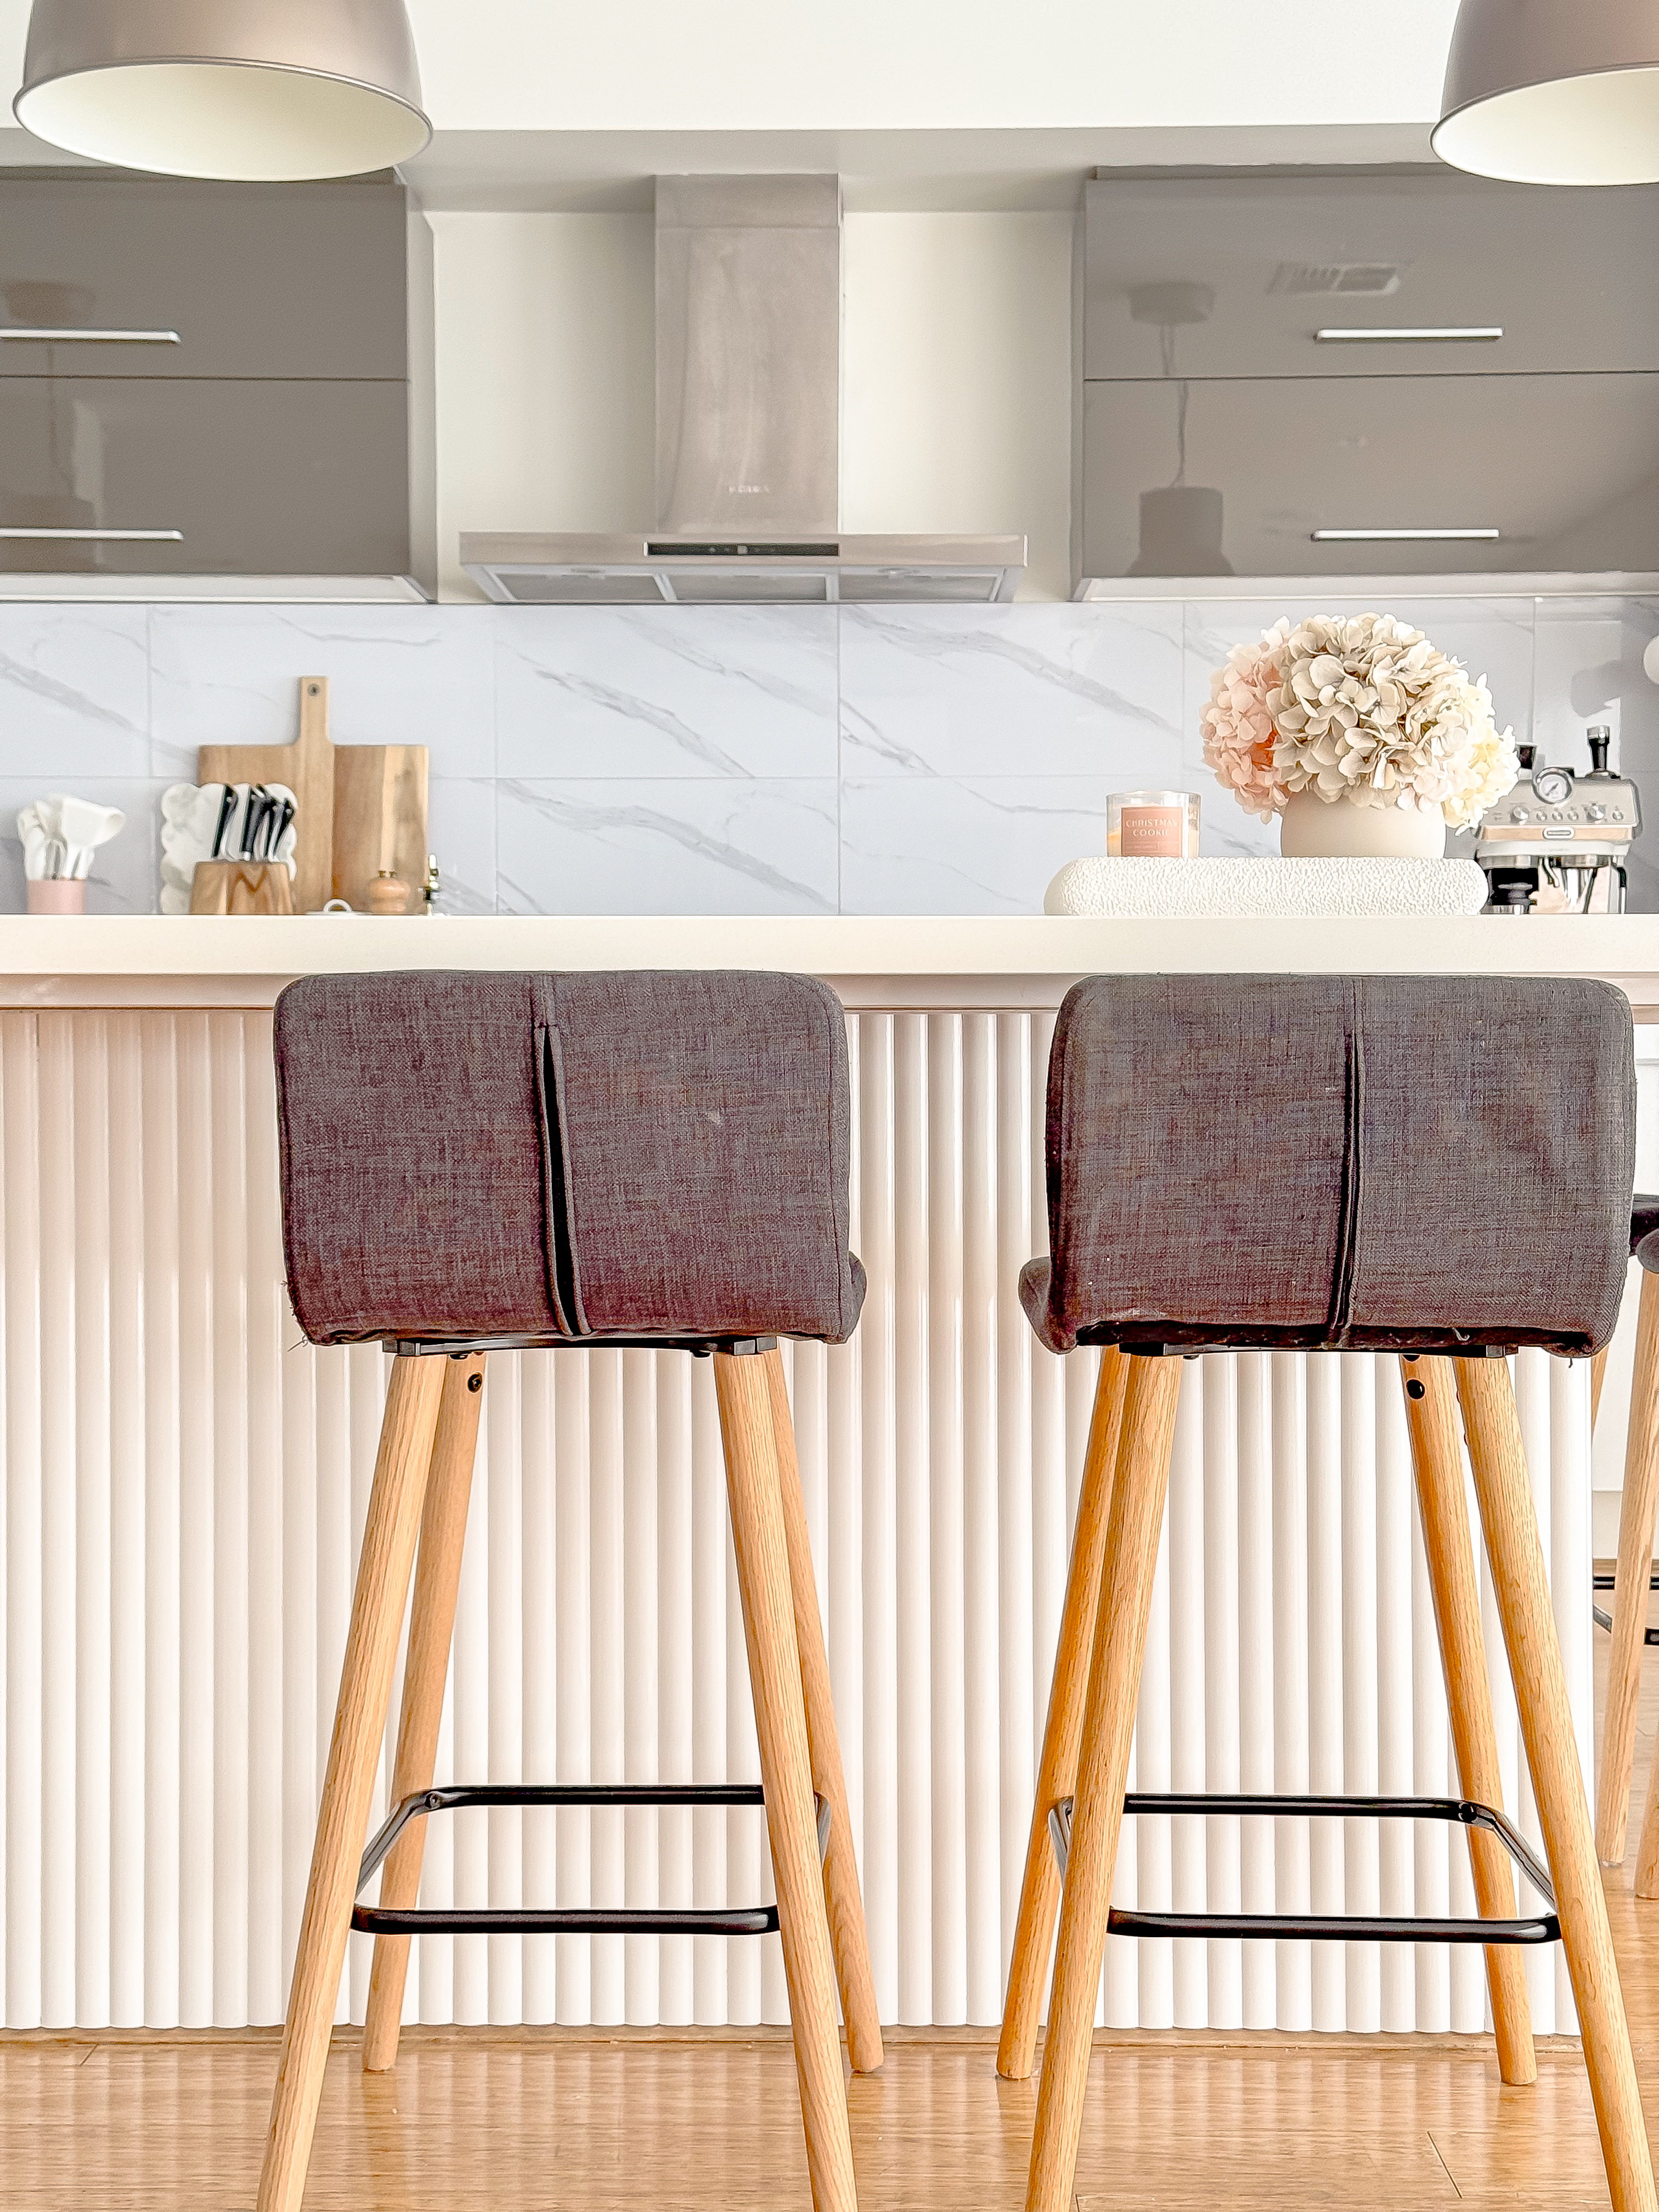
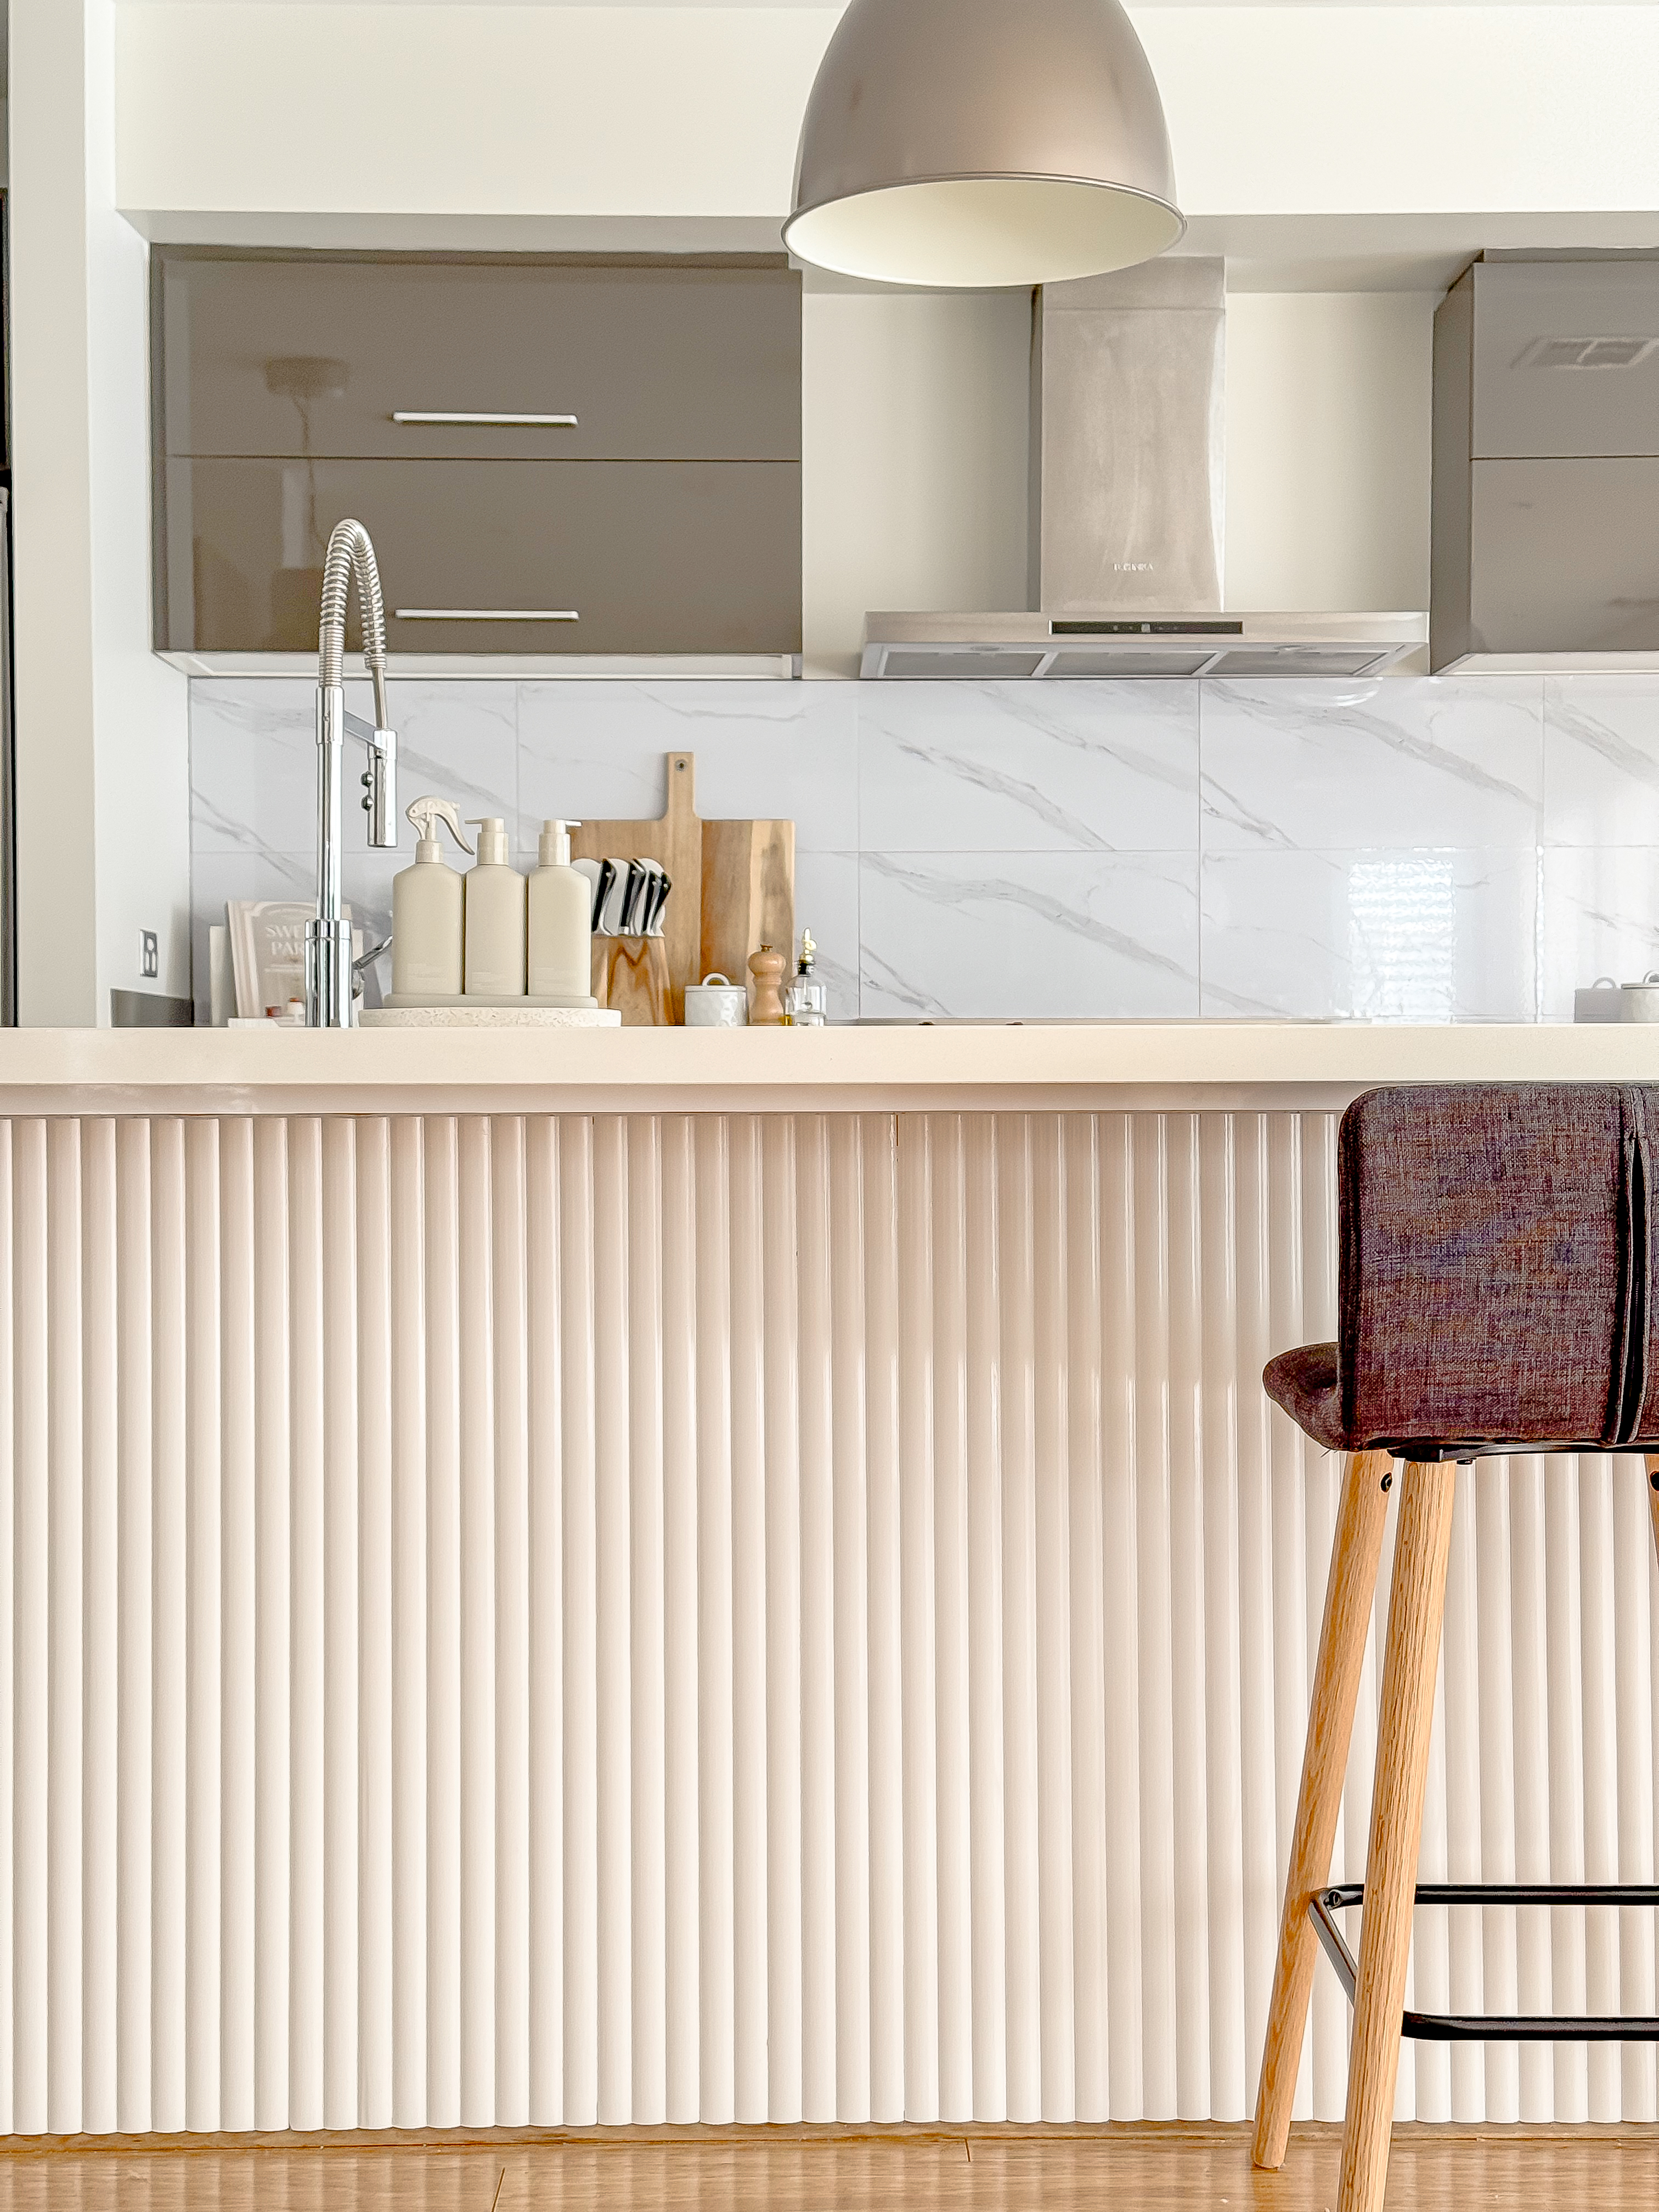
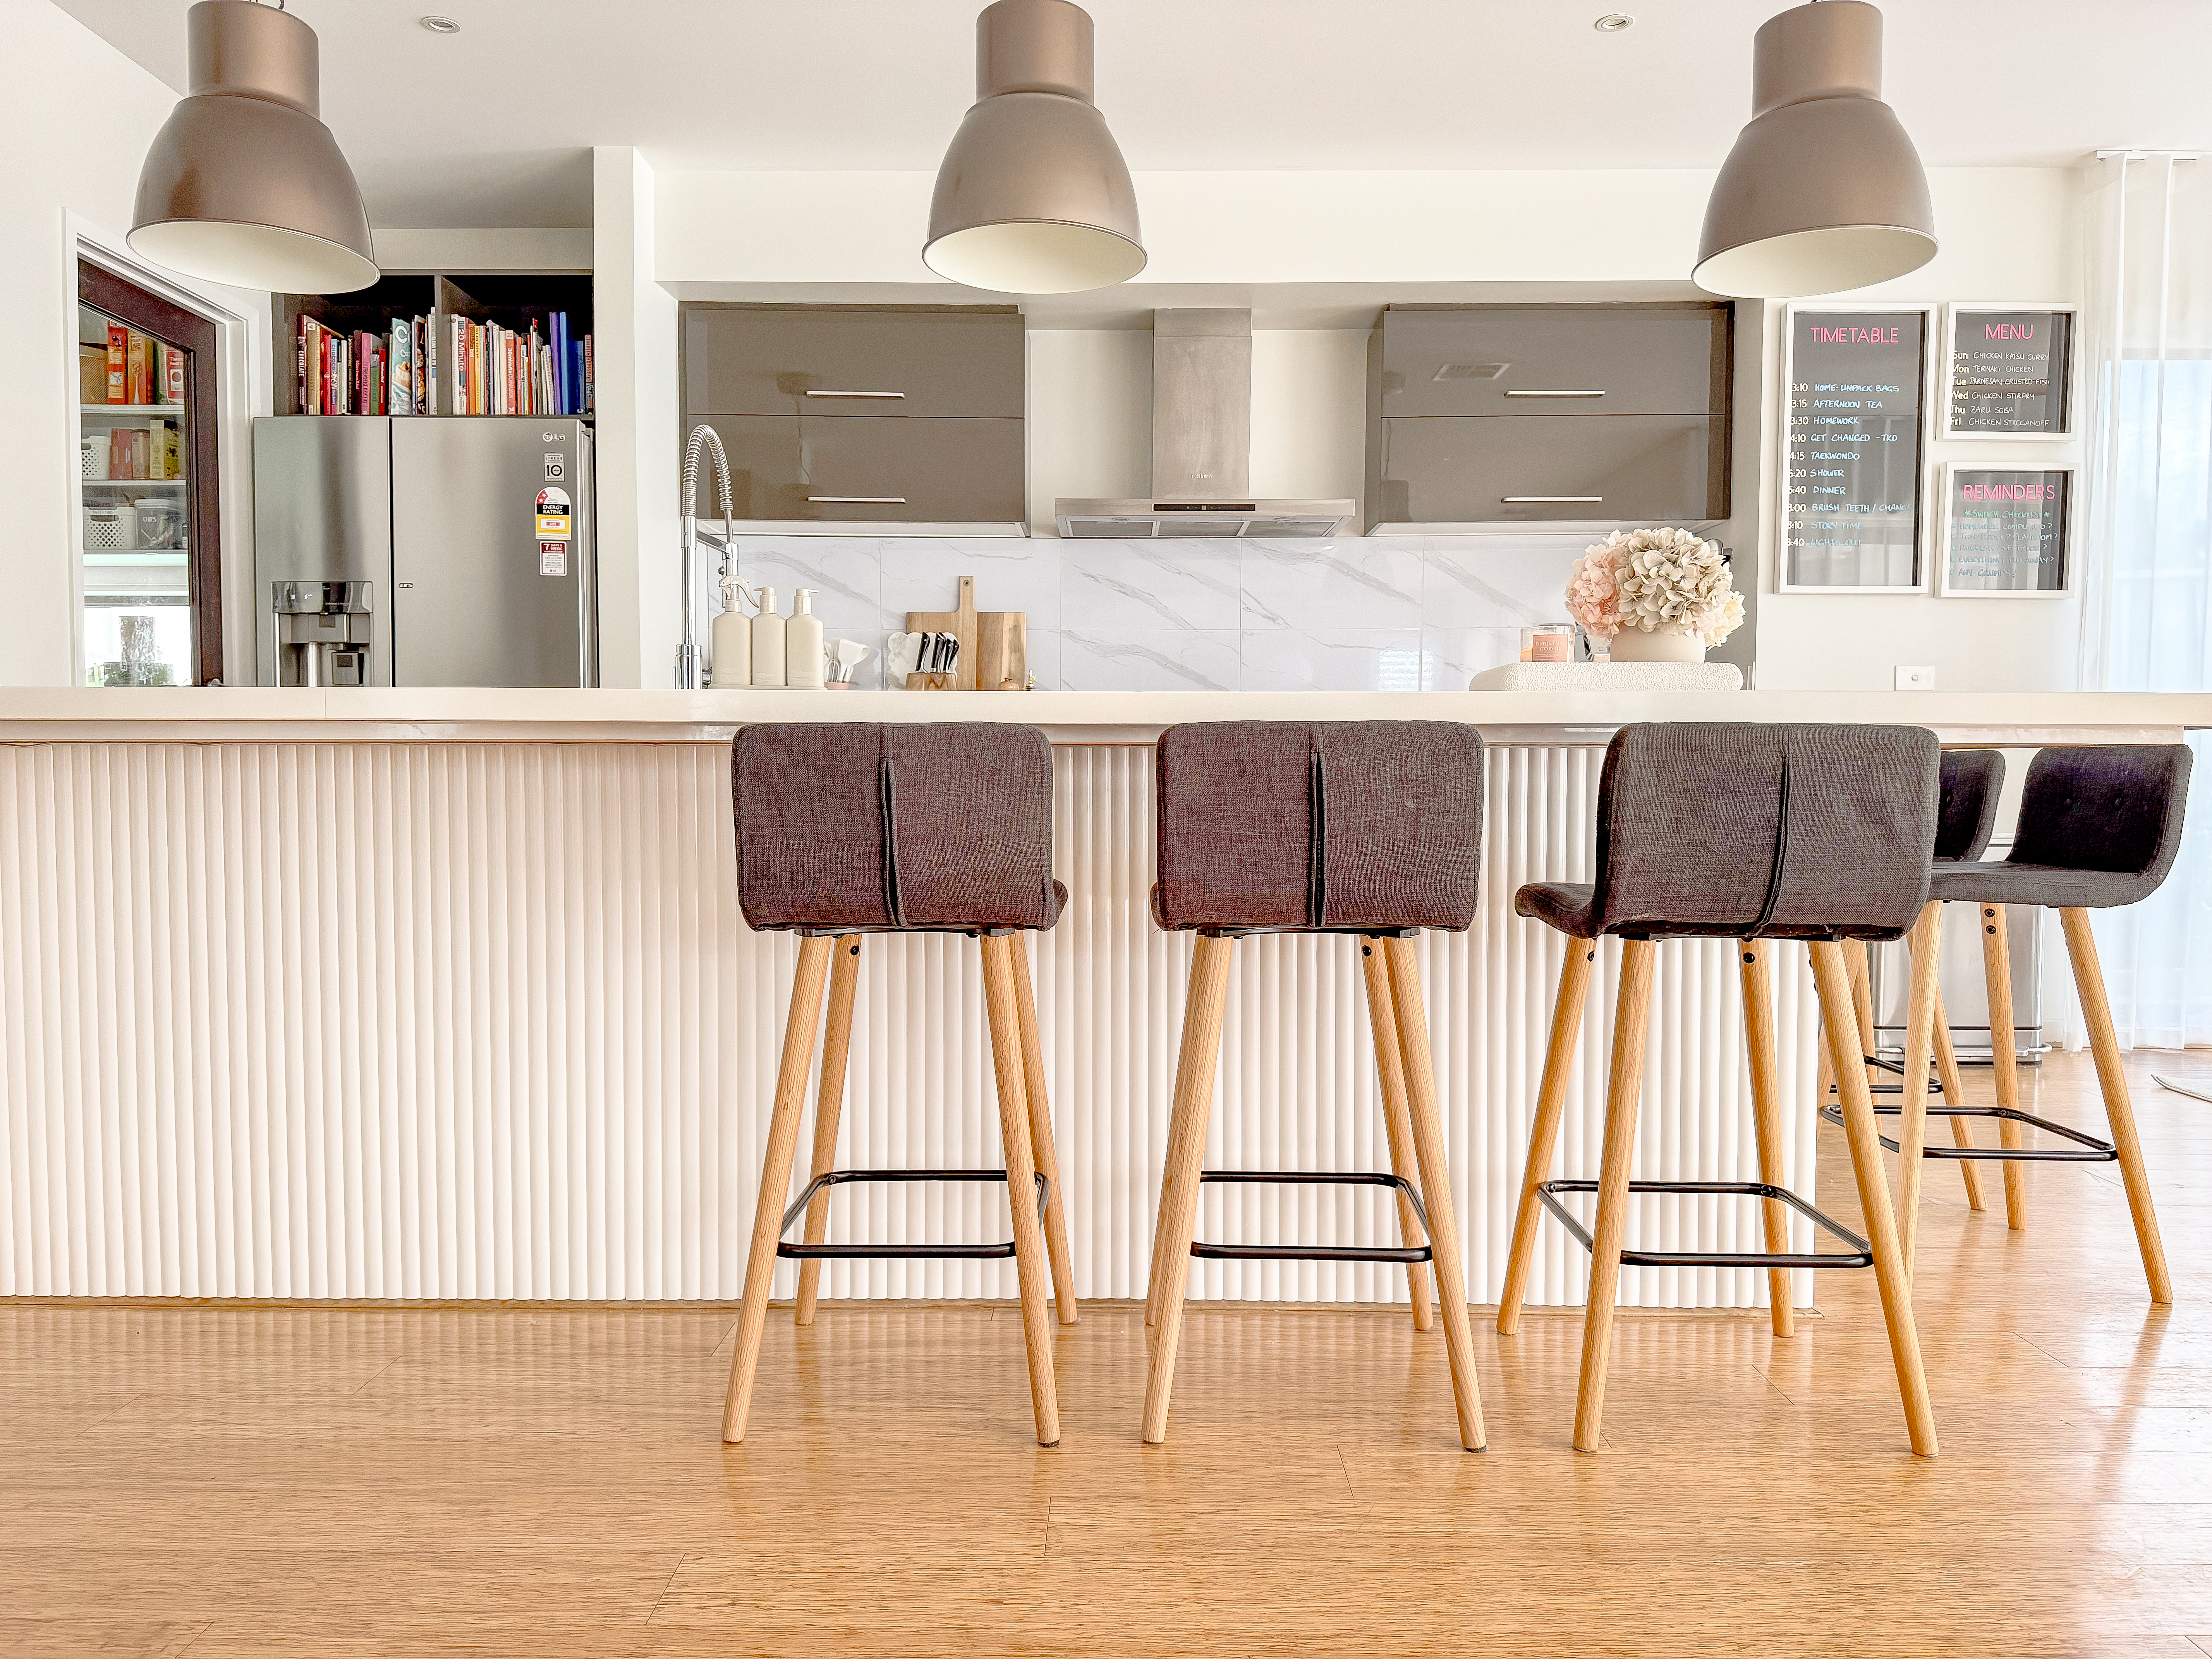
After:

And voila! A new look kitchen in 5-6 easy steps for even the novice DIYer!
Portaline Range Review:
The Dune Portaline lining boards were perfect for our kitchen space, because whilst they create a more contemporary, yet elegant and luxurious aesthetic, their gentle curves also maintain that softness for a cosier vibe.
In addition to the stunning results, what I loved about this project was that the Portaline linings boards were designed to make it such a quick and easy process for even the beginner DIYer. The Portaline lining boards are super lightweight and were easy to handle even for me! Yet they provide such an incredible, beautiful and professional finish. Whilst we felt a little daunted at the start, we needn’t have been concerned. As non-trade-professionals, we may not have carried out our project in the most efficient or conventional way (hello power point jigsaw pieces 😜), but I think in the end what matters is that we gave it a good hot go and achieved the result and professionally finished look that we wanted!
This was a super fun and very satisfying project, which has given us the confidence to move on to our next instalment. So watch this space!