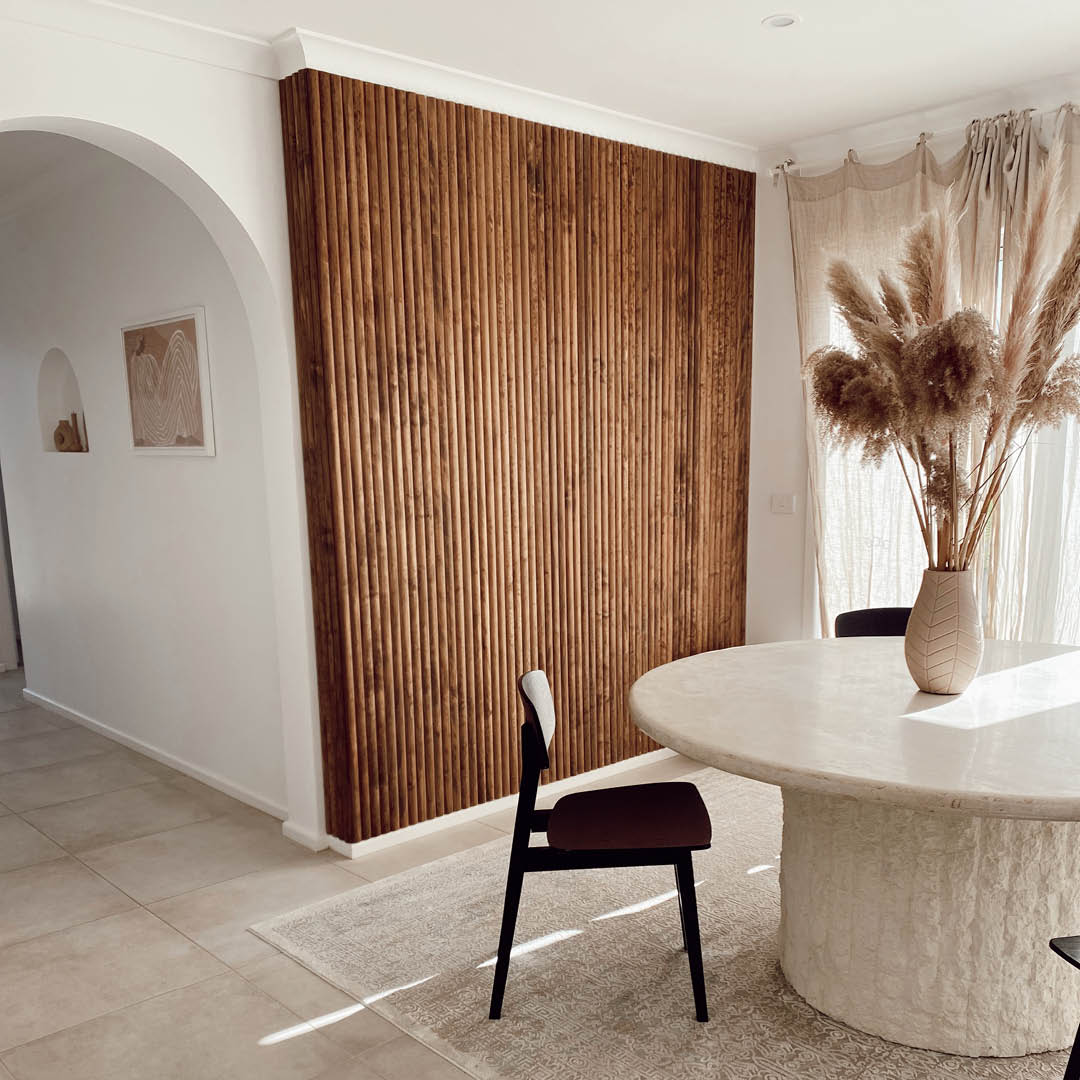
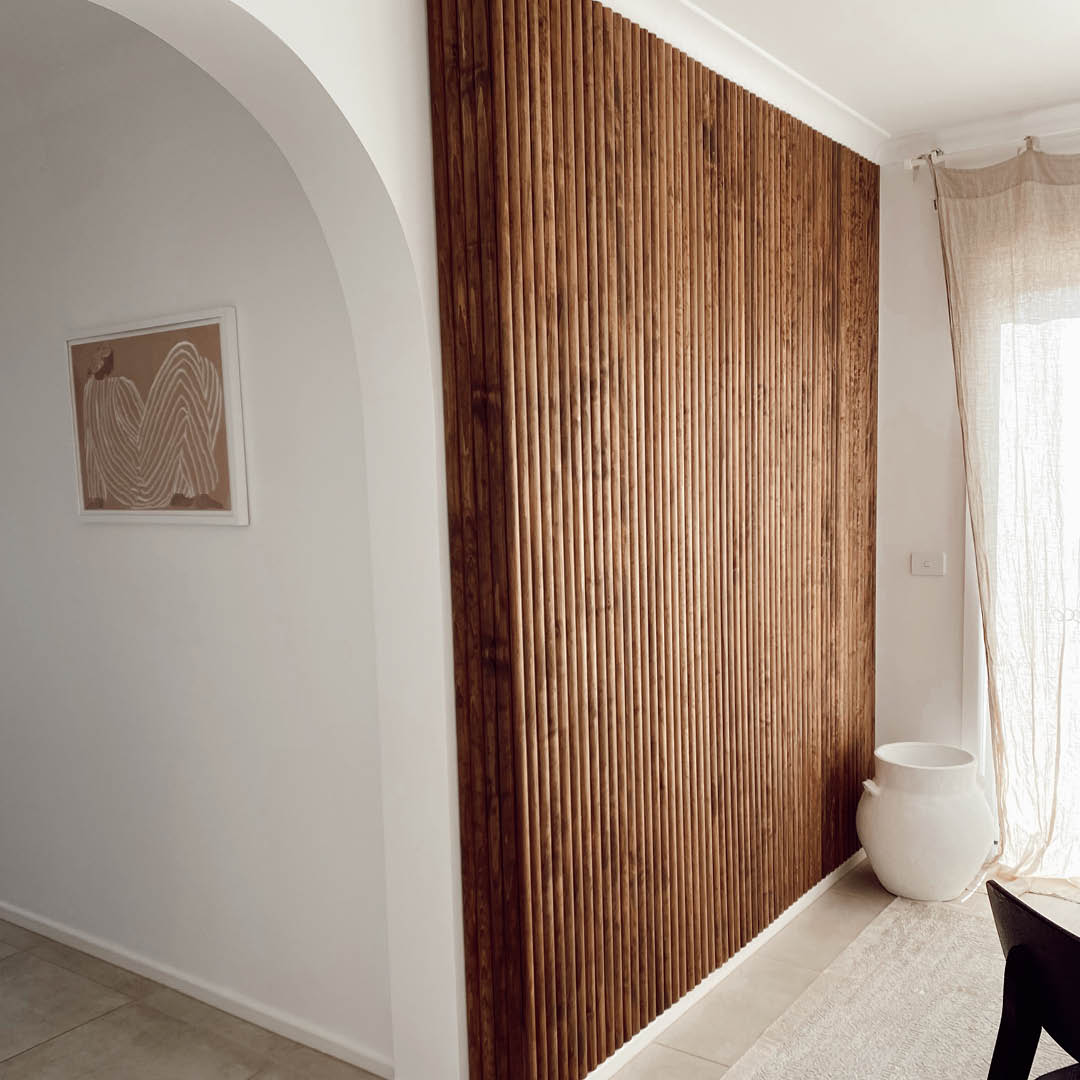
Natural variations in tone add interest to this stunning Porta Contours feature wall from freelance photographic stylist Carla Gibbons-Reid.
Located in regional Victoria, this stunning home from freelance photographic stylist Carla Gibbons-Reid is a contemporary blend of modern Mediterranean and Bohemian styles. With timber and stone accents throughout, the dining room features a beautiful wall clad in Porta Contours timber lining boards.
Inspired by their curved island bench, Carla wanted to mirror the existing timber accents elsewhere in her home.
“The Porta Contours feature wall has been in the pipeline since the design stage of our build,” explains Carla. “We knew our family wanted a Mediterranean feel for our home and we love the combination of dark timber features paired with a white or neutral palette.”
Available in a range of designer profiles, Carla selected the soft curves of Riverine. “The Riverine profile really suits the gentle curves featured throughout our home,” says Carla. “They are a match made in heaven!”
Contours timber lining boards are suitable for both straight and curved applications and can be installed vertically or horizontally to complement your space. “Porta Contours was perfect for our project because we knew the craftsmanship would be amazing. Quality materials, quality results!” exclaims Carla.
Porta Contours are available in PEFCTM Tasmanian Oak, a beautiful Australian hardwood, FSC® Clear Pine, a light softwood that is ideal for painting and staining, and FSC® Pre-Primed Pine, a finger-jointed pre-primed pine that is perfect for painted finishes.
Carla selected Contours in Clear Pine, a select grade that is easy to work as well as stain, paint, wax or colourwash. “To tie our Clear Pine Contours into the existing timber features of our home we stained the lining boards with Cabot’s interior stain in Walnut,” explains Carla.
Designed for ease of installation with a secret fix tongue and groove connection, Contours can be used in conjunction with any other Contours profile to create a completely unique design.
“The process of installing the Contours lining boards was so straightforward,” says Carla. “After cutting our Riverine Contours to length we simply stained each length and allowed them to dry. Hubby then adhered each length in position with construction adhesive as we wanted a clean finish. For any areas that needed some extra support such as the curve of the wall, nails were discretely used to ensure there would be no movement.”
Carla recommends staining or painting the lining boards prior to installation. “I’m definitely not a tradesperson but if I was to offer one tip it would be to stain or paint prior to installing the timber. We found this saved a lot of time but also a lot of potential clean up.”
Carla’s favourite element of the project is the natural tonal variation between each piece of timber. “The variation adds so much interest to the space letting the true beauty of timber stand out, accentuated by the stain applied,” explains Carla.
“The incredible quality of the product was above and beyond our expectations. We couldn’t be happier with the end result!” concludes Carla.
Design & Build: What Carla Loves
Product: Porta Contours, Riverine in Clear Pine finished with Cabot’s Interior Stain in Walnut